A driveshaft can look like a straightforward replacement part until the vehicle is on the ramp and the new unit will not seat correctly, the splines do not match, or a vibration appears after handover. This driveshaft selection guide is designed to help workshops, dealers and vehicle owners identify the correct assembly with confidence, protecting repair quality, labour time and customer trust.
The right driveshaft does more than transfer torque from the gearbox or differential to the wheels. It must maintain smooth power delivery through steering movement and suspension travel, withstand repeated loads, and fit precisely with the vehicle’s hub, transmission and mounting points. A small fitment error can result in premature wear, driveline vibration, noise or an unsafe loss of drive.
Start With Exact Vehicle Identification
Registration data is useful, but it should not be the only basis for ordering a driveshaft. Manufacturers may use different shaft lengths, spline counts, joint types and ABS arrangements across the same model range. Differences can arise between engine variants, transmission types, production years, trim levels and factory revisions.
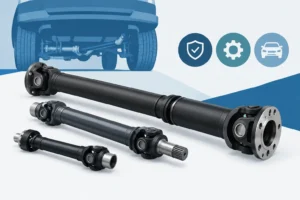
For dependable identification, begin with the vehicle identification number and confirm the make, model, year, engine code, gearbox type and driven axle. Then establish whether the required part is for the near side or off side. On front-wheel-drive vehicles, the two shafts are commonly different lengths. On many rear-wheel-drive and four-wheel-drive applications, the layout may include additional shafts, intermediate shafts or propeller shaft sections that must not be confused with a wheel driveshaft.
An OE part number remains one of the strongest fitment references where available. It helps the supplier cross-check the correct replacement against catalogue data and reduces the risk of relying on a broad model description. Where an old unit is available, compare it before fitting rather than after a problem develops.
Driveshaft Selection Guide: Match the Critical Details
A correct-looking driveshaft is not necessarily a correct driveshaft. The assembly must match several physical and functional details at the same time.
First, inspect the hub-end spline count and diameter. The outer splines must engage cleanly with the wheel hub, while the thread and nut specification must correspond to the vehicle’s original design. A mismatch here can prevent installation or compromise hub retention.
At the gearbox or differential end, confirm the connection style. Some shafts use splined stub ends retained by circlips, while others use flanges, bolted joints or tripod housings. Inner-joint designs also vary. A tripod joint is common where substantial in-and-out movement is required, while a plunging constant velocity joint may be used in other applications. The replacement must reproduce the intended movement and load capacity.
Shaft length is equally important. Measure the original unit only when it is known to be correct and undamaged. Compare the compressed and extended positions where practical, as an assembly that is too short may disengage under suspension droop, while one that is too long can bottom out and damage the inner joint.
Finally, check for an ABS reluctor ring, magnetic encoder or wheel-speed sensing arrangement. Some vehicles read wheel speed from a ring fitted to the joint, while others use a magnetic bearing seal. A driveshaft without the correct sensor provision can trigger warning lights and compromise the operation of ABS, traction control or stability systems.
Understand the Joint Design and Duty Cycle
Constant velocity joints are engineered to transfer power at changing angles without the speed fluctuations associated with simpler universal joints. However, not every CV joint faces the same working conditions.
The outer joint normally handles greater steering angles, especially on front-wheel-drive vehicles. It is often the joint most likely to click when worn, particularly during tight turns under acceleration. The inner joint is designed to accommodate the change in driveshaft length as the suspension moves. Inner-joint wear may present as shuddering, vibration under load or a clunk during acceleration and deceleration.
For standard passenger-car repairs, a quality replacement assembly built to the correct OE specification is usually the most efficient choice. It provides a new shaft, joints, boots and often the necessary retaining hardware in one component. Reconditioning a single joint may appear economical, but it can be less suitable when shaft splines, dampers, boots or the opposing joint also show age-related wear.
Duty cycle matters for commercial vehicles, taxis, delivery fleets and vehicles that operate with high payloads or frequent stop-start driving. These applications place repeated stress on joints and boots. Buyers should prioritise components with consistent material quality, accurate machining and effective sealing rather than selecting purely on initial purchase price. A repeat repair costs far more than the difference between a dependable part and an uncertain alternative.
Check the Boots, Seals and Included Hardware
Many driveshaft failures begin with a damaged CV boot rather than a failed joint. Once grease escapes and water, grit or road salt enter the joint, wear accelerates quickly. A split boot may be visible during a routine service, making early replacement far less expensive than waiting for clicking or vibration to develop.
A complete driveshaft should be supplied with durable boots, correctly fitted clips and suitable grease. Check whether the package includes the hub nut, circlip, bolts or washers required for installation. Some fasteners are torque-to-yield and should not be reused. Using old hardware where new hardware is specified can affect clamping force and introduce avoidable risk.
Before fitting, inspect the transmission oil seal around the driveshaft entry point. A worn or damaged seal can leak after the new shaft is installed, leading to an unnecessary comeback that may be wrongly attributed to the replacement part. If there is evidence of leakage, consider replacing the seal during the same job.
Avoid Common Fitment Errors
The most frequent driveshaft problems are preventable with a disciplined checking process. Workshop teams should verify the following before the vehicle leaves the bay:
- Confirm the part number against the vehicle identification and OE reference.
- Compare overall length, spline count, joint profile and sensor arrangement with the removed unit.
- Ensure the shaft is fully engaged at the gearbox or differential, including correct circlip retention where fitted.
- Tighten hub nuts and joint fasteners to the manufacturer’s specified torque and angle procedure.
- Check that boots are not twisted, stretched or contacting suspension and steering components through full movement.
Do not use excessive force to install a driveshaft. If the assembly will not engage smoothly, stop and recheck the specification. Forcing splines, striking the joint housing or pulling the shaft into position with bolts can damage the component before the vehicle has travelled a mile.
Diagnose the Fault Before Ordering
A clicking noise on full lock is a familiar sign of outer CV joint wear, but it is not the only possible cause of a driveline complaint. Wheel-bearing wear, loose suspension components, tyre damage and brake issues can create similar symptoms. Likewise, vibration under acceleration may point to an inner joint, but can also be caused by engine mounts, wheel balance, bent wheels or a damaged propeller shaft in applicable vehicles.
Inspect the old driveshaft for torn boots, grease loss, visible spline wear, play in the joints and impact damage. Ask when the symptom occurs: under acceleration, when cornering, at a particular speed, or only during braking. This practical detail helps identify whether the driveshaft is the cause and supports a repair decision based on evidence rather than assumption.
For fleet operators, recording repeat failures by vehicle type, mileage and operating conditions can reveal wider maintenance issues. Repeated boot damage, for example, may indicate harsh route conditions, incorrect previous installation or contact with another component. A better parts and inspection process can reduce vehicle downtime across the fleet.
Choose Supply Reliability Alongside Part Quality
For dealers and workshops, the right driveshaft is also one that can be sourced consistently. Availability, accurate catalogue support, clear packaging and dependable quality control all affect the speed and profitability of a repair. A supplier with broad replacement-parts coverage can also support related requirements such as wheel bearings, hub nuts, seals, engine mounts and suspension components, reducing separate orders and delays.
Multi Top supports trade customers with dependable replacement parts and knowledgeable fitment guidance built on more than 30 years of aftermarket experience. That support is particularly valuable when vehicle variants are close in appearance but differ in critical driveline specifications.
A driveshaft replacement should leave the vehicle quiet, stable and ready for dependable service. Take the time to verify fitment before installation, use the correct tightening procedure, and choose a component that is built for the work the vehicle actually performs. That discipline protects the repair, the customer relationship and the reputation of every business involved.